Adding Users to Roles
Roles are a useful way to organise task assignment between multiple people. For example, the Rapid Business Modules framework uses Roles to allocate tasks from the WHS processes to the members of the WHS Role. Adding Users to this Role would then grant them access to see and manage these tasks without needing to re-configure each workflow.
This article will walk you through creating a new role and adding members. In our example Stationary Inc is growing and needing to manage the Warehouse activities between two staff members, Kenneth and Marcia.
Creating the Role
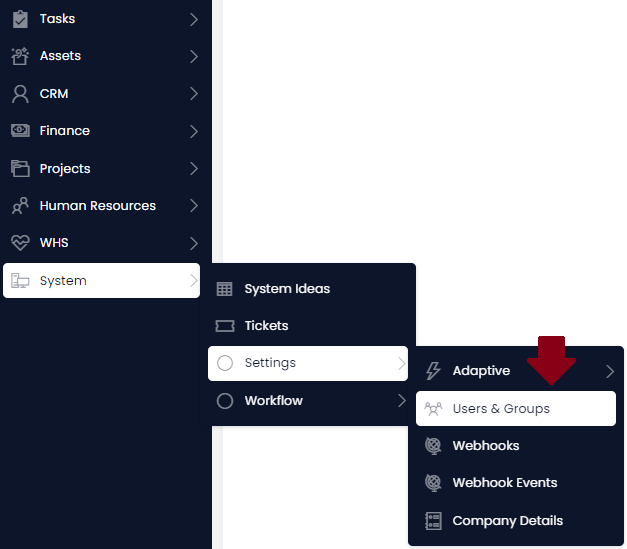
- Navigate to the Principals table in your site. By default this can be found under the System -> Settings -> Users & Groups menu in Explorer.
- Press the 'New Principal' button

- Fill in at least the Display Name and Type (Role)
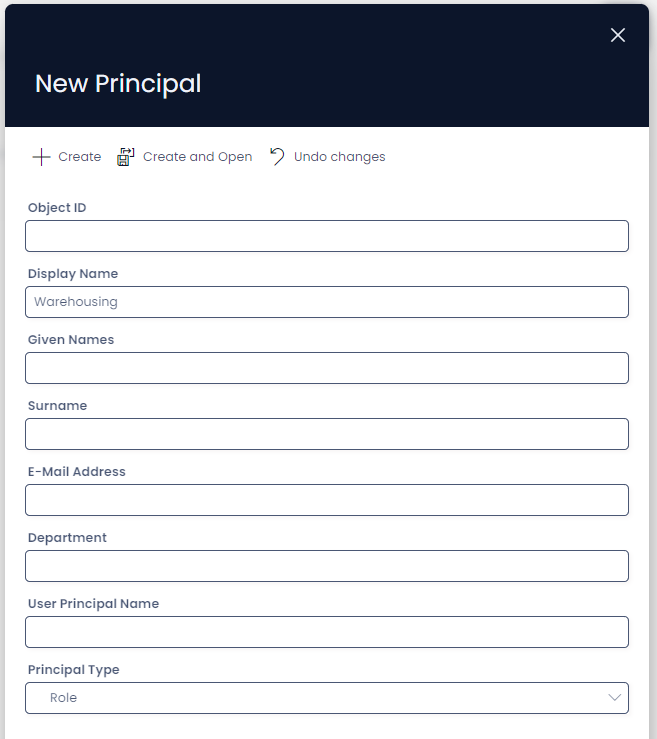
- Press Create to add the new Role to the site
Adding team members
- On the Principals list page, select the Principals we want to add to the new role. This will show the Add Principals button on the menu
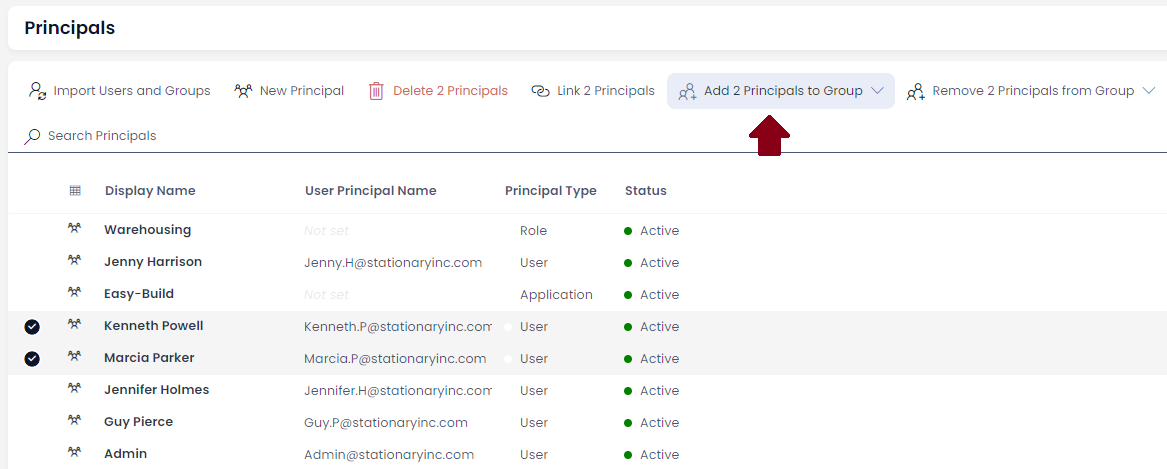
- From the Add Principals button, select the Role you want to add the Principals to. In this case our new Warehousing Role.

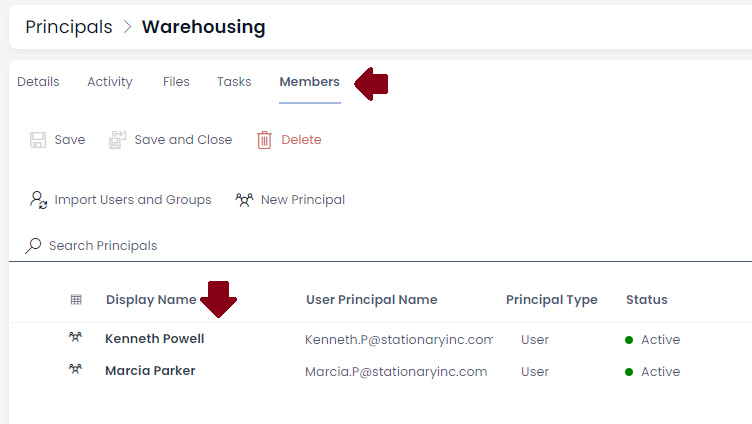
- With the Members added you can open the Role and you should see the Principals listed under the Members tab